Quick answer
- Create a master Tasks database with properties for Task Name, Status, Assignee, Due Date, and Dependencies (Relation to self)
- Add formula and rollup properties to show blocking tasks, blocked tasks, and dependency status
- Build filtered views: Blocked Tasks (showing what's waiting), Ready to Start (no incomplete dependencies), and Critical Path (high-priority chains)
- Use Board view grouped by Status to visualize workflow, and Timeline view to spot scheduling conflicts
- Update dependency links as tasks progress and review the Critical Path view weekly
Complex projects fall apart when you don’t know which task is blocking three others. A spreadsheet can’t show you that Task A is waiting on Task B, which depends on Task C that’s stuck in review. You need a visual way to map dependencies, track what’s ready to start, and identify bottlenecks before they derail your timeline.
Notion’s relation and rollup properties let you build a dependency tracker that shows these connections in real time. This guide walks you through creating one from scratch, with filtered views that surface the tasks that matter most.
What Is a Notion Dependency Tracker?
A Notion dependency tracker is a database that links tasks to each other, showing which work items must finish before others can start. It uses Notion’s relation property to create parent-child or blocker-blocked relationships between tasks.
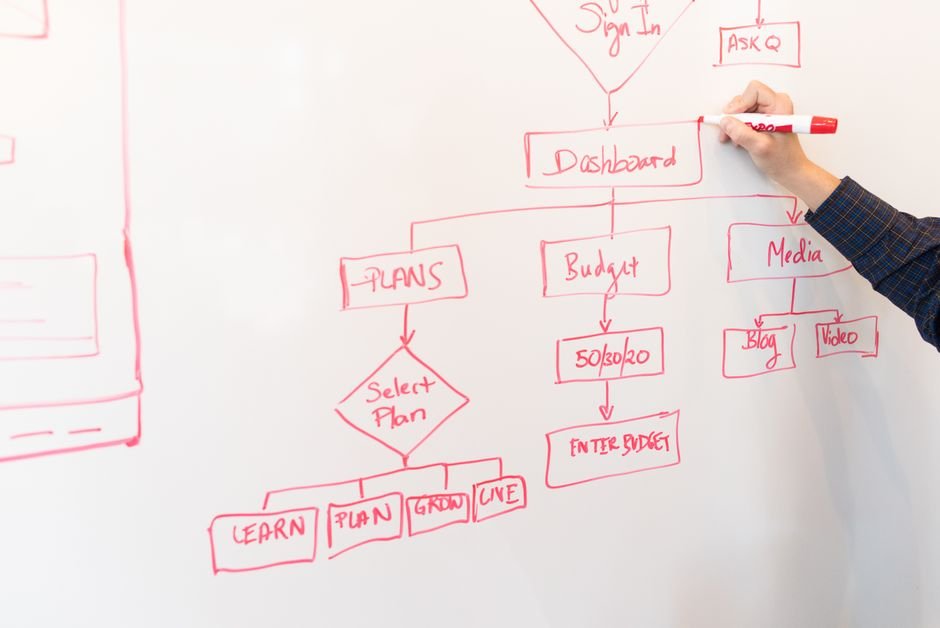
Unlike a simple task list, a dependency tracker reveals the critical path—the chain of tasks that directly affects your project deadline. When you mark a blocking task complete, the tracker automatically updates dependent tasks to show they’re ready to begin.
You’ll typically use this for software development, product launches, event planning, or any project where multiple people or teams hand off work to each other. It pairs well with a Notion workload tracker to balance team capacity across dependent tasks.
Step 1: Create Your Tasks Database
Open Notion and create a new database (full-page or inline). Name it “Project Tasks” or something similar. This will hold every task in your project, along with their dependency relationships.
Add these core properties:
- Task Name (Title): The default title field
- Status (Select): Options like Not Started, In Progress, In Review, Complete
- Assignee (Person): Who owns the task
- Due Date (Date): Deadline
- Priority (Select): High, Medium, Low
- Sprint/Phase (Select): Optional, for organizing work into cycles
Save the database and add a few sample tasks so you can test the dependency logic in the next step. Use real examples from a current project if possible—it makes setup easier to visualize.
Step 2: Add Dependency Relations
Create a new property called “Blocked By” and set the type to Relation. When prompted, choose the same database (Project Tasks) as the related database. This creates a self-referential relation, letting tasks point to other tasks in the same table.

Enable the “Show on Project Tasks” option to create a two-way relation. Notion will automatically add a second property called “Blocking” (or you can rename it). Now when you link Task A as “Blocked By” Task B, Task B will show Task A in its “Blocking” field.
For each task, click into the “Blocked By” field and select any tasks that must complete first. You can link multiple blockers. For example, a “Deploy to Production” task might be blocked by “QA Testing” and “Security Review.”
The reverse “Blocking” property now shows you which downstream tasks depend on the current one finishing. This two-way view is crucial for understanding impact when a task gets delayed.
Step 3: Add Formulas to Track Dependency Status
Create a Rollup property called “Blocked By Status.” Set it to roll up the “Blocked By” relation, show the “Status” property, and use “Show original” to display all statuses. This lets you see at a glance whether blocking tasks are complete or still in progress.
Add a Formula property called “Ready to Start” to automatically flag tasks with no incomplete dependencies. Use this formula:
if(empty(prop("Blocked By")), true, if(contains(prop("Blocked By Status"), "Not Started") or contains(prop("Blocked By Status"), "In Progress") or contains(prop("Blocked By Status"), "In Review"), false, true))This formula returns true when the “Blocked By” field is empty or when all blocking tasks show “Complete.” Tasks marked true are safe to start.
Create a second Rollup called “Blocking Count” that counts how many tasks depend on this one. Roll up the “Blocking” relation, show any property, and use “Count all.” A high number here means the task is on the critical path—delays will cascade.
These formulas save you from manually checking every dependency chain. If you’re managing multiple projects with dependencies across teams, consider tracking them in an agile workspace that separates backlogs and sprints.
Step 4: Build Filtered Views for Different Workflows
Duplicate your default table view and rename it “🚧 Blocked Tasks.” Add a filter where “Ready to Start” is unchecked and “Status” is not “Complete.” This view shows every task waiting on something else.
Create a “✅ Ready to Start” view with filters: “Ready to Start” is checked and “Status” is “Not Started.” This is your prioritized work queue—tasks with no blockers that can begin immediately.
Add a “🔥 Critical Path” view filtered by “Blocking Count” greater than 2 (or 1, depending on your project size) and “Status” is not “Complete.” Sort by “Blocking Count” descending. These are your highest-risk tasks; delays here affect the most downstream work.
Create a Board view grouped by Status to visualize workflow. Drag tasks between columns as they progress, and watch the dependency formulas update in real time. This view is especially useful in daily standups or weekly project reviews.
Add a Timeline view to spot scheduling conflicts. Enable the “Due Date” property as the date range, then look for tasks with dependencies that overlap or have unrealistic gaps. For example, if Task B is blocked by Task A but has an earlier due date, you’ve found a planning error.
These views turn your dependency tracker into a decision-making tool, not just a list. You can quickly answer “What’s blocking progress?” and “What should the team work on next?” For teams managing development workflows, pair this with a Scrum metrics tracker to monitor velocity alongside dependencies.
Step 5: Document Dependencies and Handoffs
Open each task and add notes in the task body explaining why the dependency exists and what needs to be delivered. For example, “Blocked by API Spec Doc—need endpoint definitions before starting integration.”
Use sub-items or linked databases to attach acceptance criteria, files, or meeting notes. If a task depends on a decision, link it to a decision log so the blocker is clear.
Tag the person responsible for the blocking task in a comment or update the Assignee on the blocker. This creates accountability and makes it easy to ping the right person when a dependency is overdue.
Clear documentation prevents the “I didn’t know you were waiting on me” problem. It’s especially critical for remote teams or projects with external vendors.
Ready-made Notion template
AI Project Command Center
A Notion template to track every AI tool you pay for, score its ROI, keep a prompt library and log experiments. Includes 12 pre-built AI workflows and 20+ ready-to-use prompts. Works on Notion's free plan.
Step 6: Track and Update Dependencies Weekly
Set a recurring calendar reminder to review your Critical Path view every Monday. Check if high-blocking-count tasks are on track, and flag any at risk of delay.
Update task statuses as work progresses so the “Ready to Start” view stays accurate. When you mark a blocking task complete, check the “Blocking” field to see which tasks just became unblocked, then notify those assignees.
Revise dependency links when plans change. If you decide to parallelize work or remove a dependency, unlink the relation. If a new blocker emerges, add it immediately and adjust due dates downstream.
Archive completed tasks monthly to keep the tracker fast. Create a “Status = Complete” filter, select all, and move them to an archive database or toggle an “Archived” checkbox.
Regular updates prevent the tracker from becoming stale and ensure it reflects reality. For larger teams, assign one person as the dependency owner who reconciles conflicts and maintains the critical path. If you’re also managing OKRs or quarterly goals, consider linking milestones to dependencies using goal tracking templates.
Advanced Tips for Complex Projects
Add a “Dependency Type” select property to categorize blockers as “Sequential” (must finish first), “Informational” (needs input but can overlap), or “Approval” (waiting on sign-off). This helps teams understand which dependencies are hard constraints versus soft ones.
Use a “Slack Days” number property to calculate buffer time. Create a formula that subtracts the blocking task’s due date from the blocked task’s start date. Negative numbers flag scheduling conflicts.
Link the dependency tracker to a central project dashboard. Embed the “Blocked Tasks” and “Critical Path” views on a summary page so stakeholders see bottlenecks at a glance without opening the full database.
Integrate with external tools via Zapier or Make if your team uses Jira, Asana, or GitHub for some tasks. You can sync status updates or create two-way links, though manual entry often works better for smaller teams.
Track AI experiments or tool dependencies using a similar setup. If you’re managing multiple AI projects, the AI Project Command Center includes a pre-built dependency tracker for prompt versions, model tests, and cross-tool workflows. It saves the setup time and includes formulas for ROI scoring.
When to Use a Dependency Tracker vs. Other Notion Tools
A dependency tracker works best when tasks have clear handoffs and your timeline is tight. Use it for product launches, software releases, event planning, or multi-phase consulting projects.
Use a simple kanban board instead if your project is mostly parallel work with few dependencies. A Board view grouped by status is faster to maintain and easier for small teams to adopt.
Pair the tracker with a workload view if your bottleneck is team capacity, not task sequencing. A workload tracker shows who’s overloaded, while the dependency tracker shows what’s blocked.
Consider a dedicated project management tool like Asana or ClickUp if you need Gantt charts, auto-scheduling, or dependency alerts. Notion’s dependency tracking is manual—it won’t auto-shift due dates when a blocker slips. For a deeper comparison, see Notion vs Asana for freelancers.
Common Mistakes to Avoid
Don’t over-link dependencies. If every task is blocked by five others, the tracker becomes noise. Only map true blockers—tasks that cannot start until another finishes.
Don’t forget to update statuses. A dependency tracker is only useful if it’s current. Stale data leads to bad decisions. Assign one person to own updates, or make status changes part of your daily standup ritual.
Don’t rely on the tracker alone for communication. The database shows what’s blocked, but you still need to talk to people. Use comments, @mentions, or a linked meeting notes template to discuss delays and solutions.
Don’t build the tracker in isolation. Involve the team in defining dependencies during sprint planning or project kickoff. They’ll spot relationships you miss and are more likely to maintain a system they helped design.
Customizing the Tracker for Your Team
Every project is different, so adapt the database to your workflow. Add a “Risk Level” property to flag dependencies with uncertain timelines. Create a “External Dependency” checkbox for blockers outside your control, like vendor deliveries or client approvals.
For agencies or consultancies managing multiple clients, duplicate the tracker per project and link them to a master client portal. Clients can see high-level status without accessing your internal dependency chains.
If you’re running Agile sprints, add a “Sprint” select property and filter the Critical Path view to show only the current sprint’s blockers. This keeps the daily standup focused on near-term risks.
For content teams, replace “Blocked By” with dependencies like “Waiting on Draft” or “Needs Legal Review,” and link tasks to an editorial calendar. The same relation logic applies to publishing workflows.
Maintaining the Tracker Over Time
A dependency tracker degrades quickly if it’s not maintained. Schedule a quarterly review to prune outdated tasks, simplify overly complex dependency chains, and archive completed projects.
Ask the team for feedback on which views they actually use. If no one checks the Timeline view, delete it. If everyone complains the Critical Path threshold is too low, adjust the filter.
Document the tracker’s logic in a Notion wiki so new team members understand the properties and views. Include screenshots of the formulas and examples of when to add a dependency versus when to skip it.
Link the tracker to your broader project management ecosystem. If you use Notion for OKR tracking, link milestones to the dependency database. If you track bugs separately, connect the bug tracker so critical fixes show up as dependencies in feature work.
The goal is a living document that evolves with your projects, not a rigid template that gets abandoned after the first sprint.
For more Notion productivity systems and templates, explore the full AI Tools category on Digitify.
Frequently asked questions
Can Notion automatically reschedule tasks when a dependency is delayed?
No, Notion does not auto-adjust due dates based on dependency changes. You'll need to manually update due dates when a blocking task slips. However, formulas and rollups can flag which tasks are affected, making it easier to identify what needs rescheduling.
How do I show dependencies in a Gantt chart in Notion?
Notion's Timeline view can display tasks along a date range, but it doesn't draw dependency arrows like traditional Gantt charts. You can see which tasks overlap by enabling the 'Blocked By' property as a visible column in Timeline view, but visual linking requires third-party tools or manual color-coding.
Can I use the same dependency tracker across multiple projects?
Yes. Add a 'Project' select or relation property to tag which project each task belongs to, then create filtered views per project. Alternatively, duplicate the database template for each major project to keep them separate and faster to load.
What's the difference between 'Blocked By' and 'Related To' in Notion?
'Blocked By' is a custom relation property you create to show hard dependencies—tasks that cannot start until another finishes. 'Related To' is a generic link with no workflow logic. Use 'Blocked By' when sequence matters and 'Related To' for reference or context.
How do I prevent circular dependencies in my Notion tracker?
Notion won't stop you from creating circular links (Task A blocks Task B, which blocks Task A). To avoid this, visually map dependencies on a whiteboard or flowchart first, then enter them into Notion. If you suspect a loop, trace the 'Blocked By' chain manually or use a Board view to spot illogical sequences.
Yes. You can share a filtered view (e.g., 'Critical Path' or 'Blocked Tasks') as a public link or invite guests with comment or view-only access. Be cautious with guest permissions—they'll see all properties unless you hide sensitive columns like internal notes or salary data.