Introduction To Hubspot CMS Tutorial
In today’s digital landscape, having a strong online presence is crucial for businesses of all sizes. The HubSpot CMS Hub is a comprehensive, all-in-one platform that makes it easy to create, optimize, and automate your website, blog, and marketing campaigns. In this guide, we’ll walk you through the process of setting up the HubSpot CMS Hub with your website, so you can start reaping the benefits of this powerful platform.
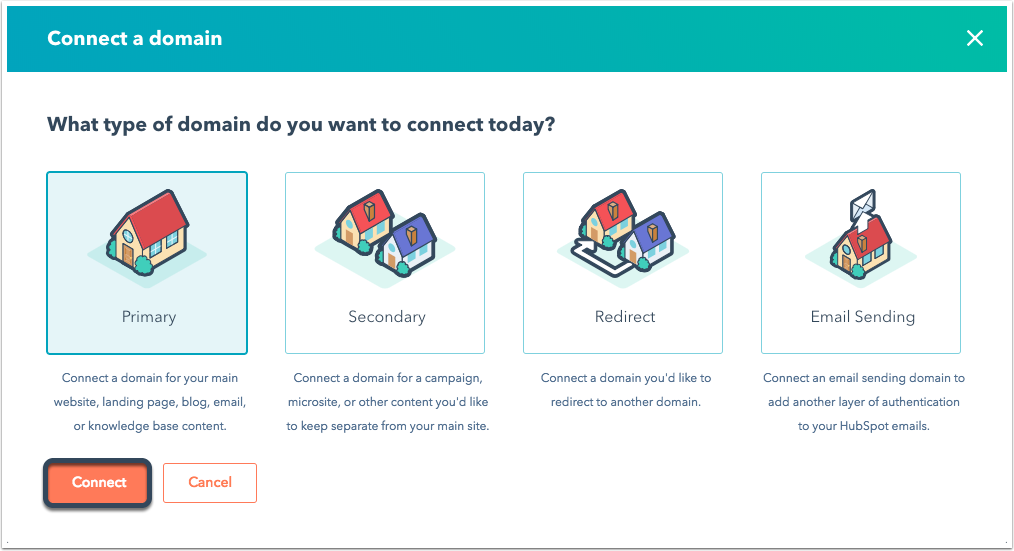
Step 1: Connect Your Domain
The first step in setting up the HubSpot CMS Hub with your website is to connect your domain. This can be done by updating your DNS settings to point to HubSpot’s servers, or by using a CNAME record to connect a subdomain. This will allow you to use your own custom domain name for your website, instead of a subdomain provided by Hubspot.
Step 2: Import Your Website
Once your domain is connected, you can import your existing website into the HubSpot CMS Hub. This can be done by using the platform’s import tool, which allows you to upload an HTML file or enter the URL of your existing website. This step is useful if you already have a website and want to move it to the Hubspot CMS.
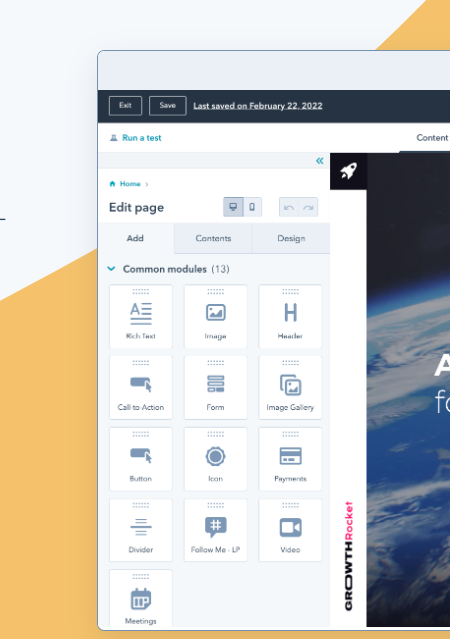
Step 3: Customize Your Design
After your website has been imported, you can use the drag-and-drop website builder to customize the design and layout of your website.
You can choose from a range of customizable templates, or create your own design from scratch. This step is useful if you want to give a new look and feel to your website.
Digitify.nl
Step 4: Add and Manage Your Content
The HubSpot CMS Hub allows you to easily add and manage your website’s content, including pages, blog posts, and landing pages. You can also use the built-in SEO tools to optimize your content for search engines. This will help you to make sure your website’s content is search engine friendly.
Step 5: Connect Your Analytics
To track the performance of your website, you can connect your Google Analytics account to the HubSpot CMS Hub. This will allow you to view analytics data directly within the platform. This is useful if you want to track the performance of your website.
Step 6: Test and Publish
Before publishing the website, you can test your website design, content, and functionality by running a test on it. After that, you can publish the website to make it live. This step is crucial as it will make sure that your website is working correctly and there are no errors on it.
Step 7: Integrate with Other Tools
You can use Hubspot’s powerful integrations feature to connect your website with other tools such as CRM, email marketing, social media, and more. This will allow you to automate your marketing and streamline your processes, making it easier to manage your website and online presence.
Conclusion
The HubSpot CMS Hub is a powerful, all-in-one platform that makes it easy to create, optimize, and automate your website, blog, and marketing campaigns. By following this guide, you’ll be able to set up the HubSpot CMS Hub with your website