The beauty of the Kanban system is that it works in any context. It helps you visualize your work and ensure it’s all moving in the right direction, whether you’re running a marketing campaign, planning a product launch or even organizing a party. It’s a quite handy tool.
So, you must know What is a Kanban Board and How to Use Kanban Board?
What is Kanban Board?
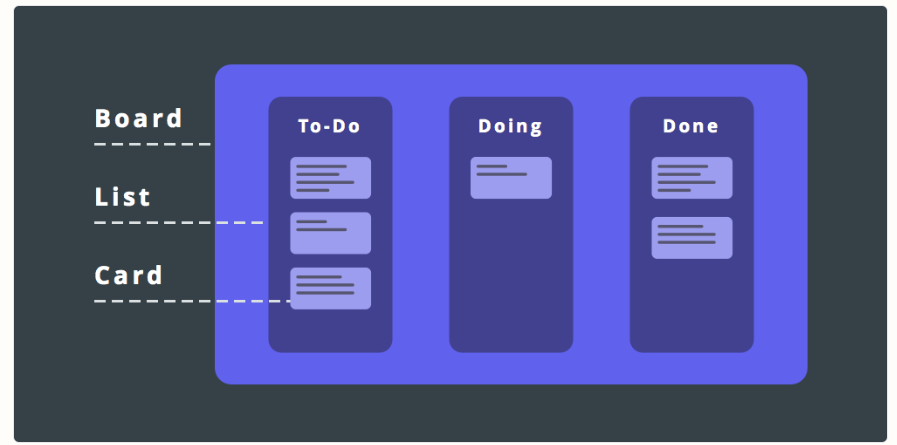
A Kanban Board is an agile project management tool designed to help visualize work, limit work-in-progress, and maximize efficiency (or flow). “Kanban” is the Japanese word for “visual signal.” If you work in services or technology, your work is often times invisible and intangible. It helps make your work visible so you can show it to others and keep everyone on the same page.
It can help both agile and DevOps teams establish order in their daily work. It uses cards, columns, and continuous improvement to help technology and service teams commit to the right amount of work, and get it done!

Benefits of Kanban Board
Kanban at its core is summarized by the premise: stop starting, start finishing. The entire team’s focus is on getting to “done” for the tasks in progress.
- Shorter cycle times can deliver features faster
- Responsiveness to change: When priorities change very frequently, it is ideal
- Balancing demand against throughput guarantees that most the customer-centric features are always being worked
- Requires less organization and fewer room set-up changes to get started
- Reducing waste and removing activities that don’t add value to the team/department/organization
- Rapid feedback loops improve the chances of more motivated, empowered, and higher-performing team members

Elements of a Kanban Board
David Anderson established that these boards can be broken down into five components:
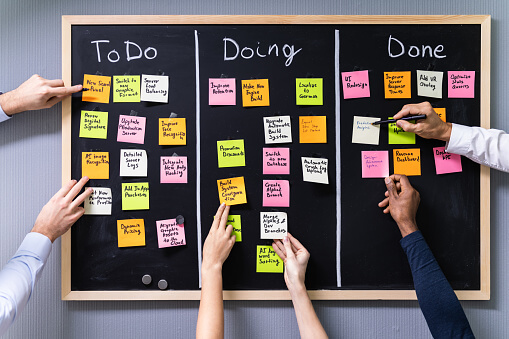
- Visual Signals — One of the first things you’ll notice about a kanban board are the visual cards (stickies, tickets, or otherwise). Kanban teams write all of their projects and work items onto cards, usually one per card. For agile teams, each card could encapsulate one user story. Once on the board, these visual signals help teammates and stakeholders quickly understand what the team is working on.
- Columns — Another hallmark of the kanban board are the columns. Each column represents a specific activity that together compose a “workflow”. Cards flow through the workflow until completion. Workflows can be as simple as “To Do,” “In Progress,” “Complete,” or much more complex.
- Work In Progress (WIP) Limits — WIP limits are the maximum number of cards that can be in one column at any given time. A column with a WIP limit of three cannot have more than three cards in it. When the column is “maxed-out” the team needs to swarm on those cards and move them forward before new cards can move into that stage of the workflow. These WIP limits are critical for exposing bottlenecks in the workflow and maximizing flow. WIP limits give you an early warning sign that you committed to too much work.
- Commitment point — Kanban teams often have a backlog for their board. This is where customers and teammates put ideas for projects that the team can pick up when they are ready. The commitment point is the moment when an idea is picked up by the team and work starts on the project.
- Delivery point — The delivery point is the end of a kanban team’s workflow. For most teams, the delivery point is when the product or service is in the hands of the customer. The team’s goal is to take cards from the commitment point to the delivery point as fast as possible. The elapsed time between the two is the called Lead Time. Teams are continuously improving to decrease their lead time as much as possible.
A kanban board with these five elements will undoubtedly set your team up for success.

How to Use Kanban Board Explained in 5 easy steps:
Step 1: Visualize your workflow
To create a Kanban Board, get a whiteboard, then break down the flow of work from the moment you start it to when it’s finished into distinctive steps and draw a column for each.
Step 2: Identify the types of work you do
Decide what kinds of work items you are usually working on. These may be, for example, customer orders, support requests, or maintenance tasks. Assign a distinctive color to each of them, and get a bunch of sticky notes in these colors.
Step 3: Write down tasks on cards and place them on the board
Write down each thing you are working on on a separate color-coded sticky note, and put it onto the board into the respective column. The order of cards in each column should represent their relative priority, with the most urgent ones at the top.
Step 4: Start working with your Kanban board
Work on tasks starting with the ones at the top. When a task is ready to be moved to the next column, place it at its bottom. Such a method of working will help to maintain a high flow of work on your board.
Step 5: Improve the flow of work
Kanban is all about maintaining a high and consistent flow of work. With your board, you should be able to see the overview of work status and instantly identify any problems or bottlenecks. No work item should lag behind, and columns should not be overloaded with tasks. The most straightforward technique to ensure consistent flow is limiting work in progress.
Conclusion
Create boards for your next projects, add lists and labels that fit your workflow, bring in all of your tasks, and give it a try. Customize until everything feels just right. It might take a bit of time, but once you have your board title, list names, and card formats in place, you’ll be ready to tackle your first task. And before you know it, you’ll be using Kanban boards as much as I do.
Read More: A Guide to Slack: How to Use Slack in 2022 Detailed Explanation